

Introduction
As the days get longer and the flowers begin to bloom, it’s time to get your RV ready for the open road once more. After months of hibernation, there are some essential steps you should take to ensure your home-on-wheels is in top shape for your next adventure. This comprehensive guide will walk you through the process of dewinterizing your RV, from checking the tires to flushing the water system and removing antifreeze from the plumbing system.
- Inspect and Inflate Tires
Before hitting the road, make sure to inspect your RV’s tires for any signs of wear or damage. Check the tire pressure and inflate them to the manufacturer’s recommended PSI, which can usually be found in your owner’s manual. Don’t forget to also check the spare tire, ensuring it’s in good condition and properly inflated.
- Check the Battery
After a long winter, it’s essential to test your RV’s battery to make sure it still holds a charge. Remove any corrosion from the battery terminals and fully charge it if necessary. If your battery is more than a few years old or shows signs of wear, it may be time to replace it.
- Inspect Seals and Roof
Examine the seals around windows, doors, and vents for any cracks or damage. Repair or replace any damaged seals to prevent water leaks and drafts. Additionally, check the roof for signs of damage or wear, paying close attention to seams and any areas where water might pool.
- Remove Antifreeze from the Plumbing System
When winterizing your RV, it’s common to use non-toxic antifreeze in the plumbing system to prevent damage from freezing temperatures. Before using your RV in warmer weather, you’ll need to flush the antifreeze from the system. Start by opening all faucets and drain valves, allowing any remaining antifreeze to drain out. Next, close all drain valves and faucets before proceeding with flushing the water system.
- Flush the Water System
To ensure your water system is clean and free of contaminants, you’ll need to flush it out. Begin by draining any remaining antifreeze from the system. Close all drain valves and faucets, then fill the freshwater tank with a solution of water and bleach (1/4 cup of bleach per 15 gallons of water). Run the solution through the system by turning on each faucet, one at a time, until you see the water-bleach solution coming out. Let it sit for at least four hours (overnight would be optimal), then drain the system and refill it with fresh water. Run the fresh water through the system to flush out any remaining bleach solution.
- Service the Water Heater with a Vinegar Solution
After flushing the water system, it’s important to clean and descale the water heater to remove any mineral deposits that may have accumulated. Start by turning off the water heater and ensuring it’s cool. Drain the water heater by opening the drain valve and removing the anode rod or drain plug.
Prepare a vinegar solution by mixing 2 cups of white vinegar with 2 gallons of water. Pour the solution into the water heater using a funnel or a small hose connected to the anode rod or drain plug opening. Replace the anode rod or drain plug and close the drain valve.
Turn on the water pump and open the hot water faucets inside the RV. Allow the vinegar solution to circulate through the system for a few minutes before turning off the faucets and water pump. Let the solution sit in the water heater for at least four hours, or preferably overnight, to dissolve mineral deposits.
After the vinegar solution has had time to work, drain the water heater by opening the drain valve and removing the anode rod or drain plug. Flush the water heater by running fresh water through it until the water runs clear. Replace the anode rod or drain plug and close the drain valve.
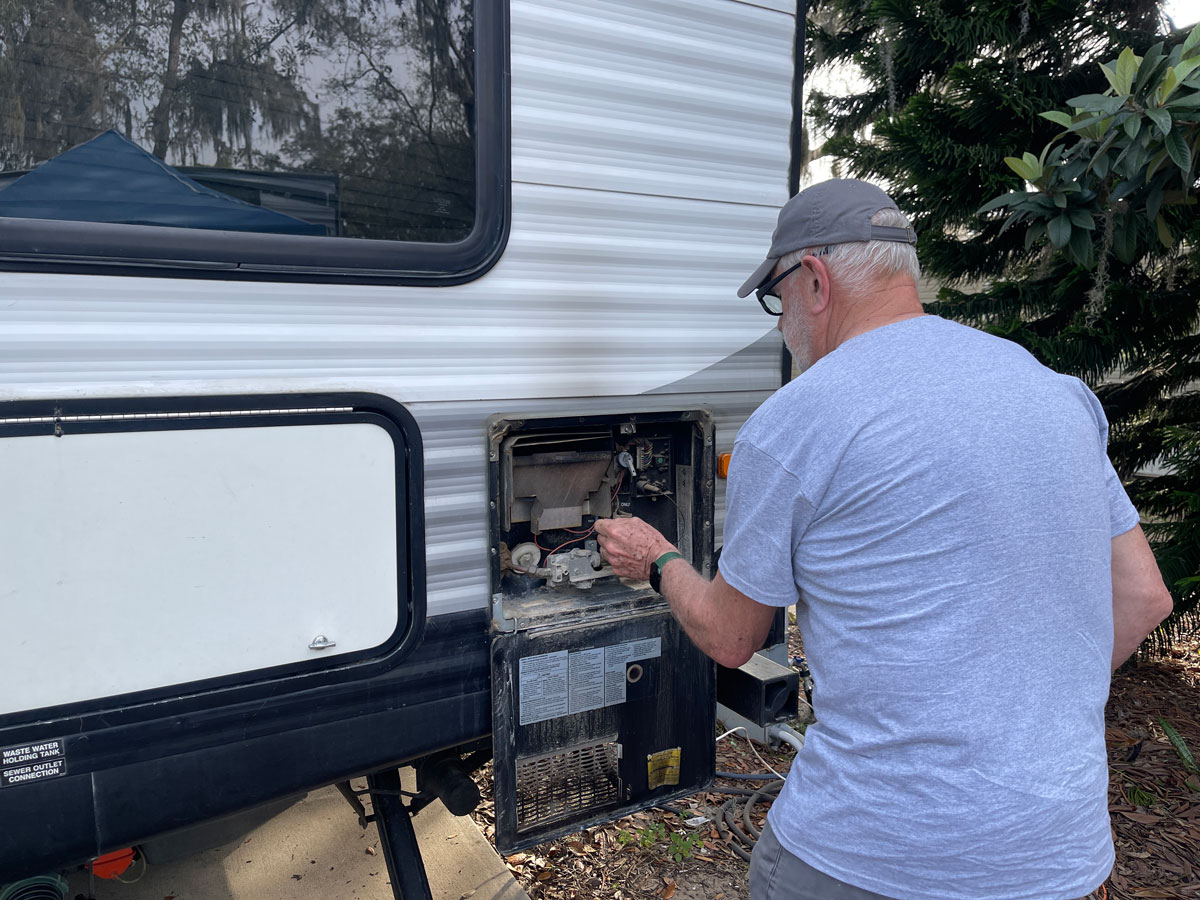
- Test Appliances and Systems
Now that your RV’s water system is clean, it’s time to test your appliances and systems. Check your refrigerator, stove, oven, and any other appliances to ensure they’re functioning properly. Test your air conditioning and heating systems as well, and replace any air filters if needed.
- Inspect the Propane System
Before using your propane appliances, it’s crucial to inspect the propane system for any leaks or damage. Check hoses, connections, and regulators for signs of wear or damage. If you suspect a leak, perform a soapy water test by spraying a mixture of water and dish soap on the connections. If bubbles form, there’s a leak that needs to be repaired before using the propane system (if concerns remain, contact a certified RV Tech to perform a Propane Pressure Drop Test).
- Clean the Interior
Give your RV’s interior a thorough cleaning to remove any dust, dirt, or grime that may have accumulated over the winter. Vacuum carpets, mop floors, and wipe down surfaces to create a clean and comfortable living space.
- Restock Supplies
Replenish your RV with essential supplies, such as toiletries, cleaning products, and non-perishable food items. Don’t forget to check expiration dates on items that have been stored over the winter.
- Update Safety Equipment
Before hitting the road, make sure your safety equipment is in good working order. Test your smoke and carbon monoxide detectors, and replace batteries if needed. Check the expiration date on your fire extinguisher and replace it if necessary.
Conclusion
By following these dewinterizing steps, you’ll ensure your RV is road-ready and prepared for another season of adventure. With a clean and properly maintained RV, you can focus on enjoying your travels and creating lasting memories. Happy camping!